Ingredients:
2 1/4 lbs chuck roast, shoulder cut
extra virgin olive oil
2 lg yellow onions
3 cloves of garlic
1 3" sprig of fresh oregano
1 14 oz. can of chicken broth
1 14 oz. can of water
1 14.5 oz can of stewed chopped tomatoes
1/4C New Mexico mild chile powder *
1T Hatch hot green chile powder*
1T cumin
1T pasilla chile powder
1t garlic powder
1t onion powder
salt to taste
1/4C corn meal
Garnishes:
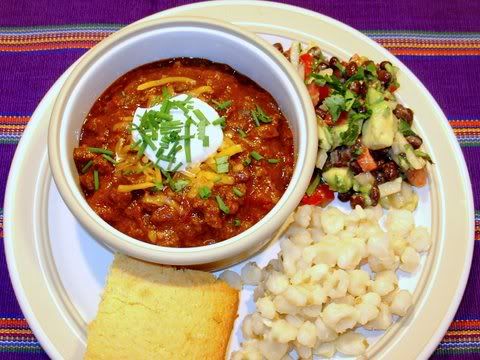
heavy sour cream
grated cheddar cheese
chopped chives or diced red onion
Directions:
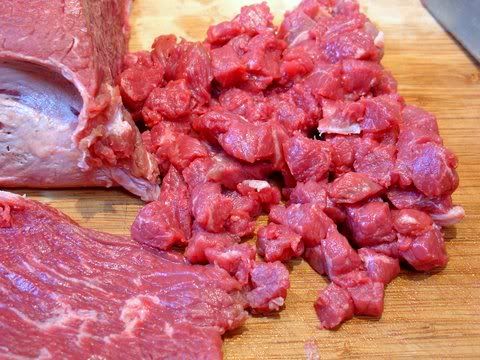
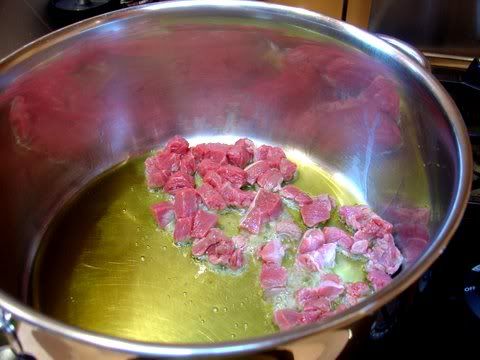

Meat is king in the realm of chili and most of the cuts used for it are on the tough side so cooking should be long and slow. A typical chuck roast has some silver skin you may wish to cut around, so by all means do, then dice the meat into 1/2" cubes. Many traditional chili recipes use coarsely ground chuck, an easier method than this. I like the chunkier texture and the feeling I get that this is not just another hamburger recipe. Cover the bottom of your stock pot with a thin layer of extra virgin olive oil and start to brown the cubed chuck in small batches over a medium high heat, so you do not lower the temperature of the oil by a significant amount. If you overcrowd the pot, the meat will not brown and your chili will not have the depth of flavor that will make it rich in taste.
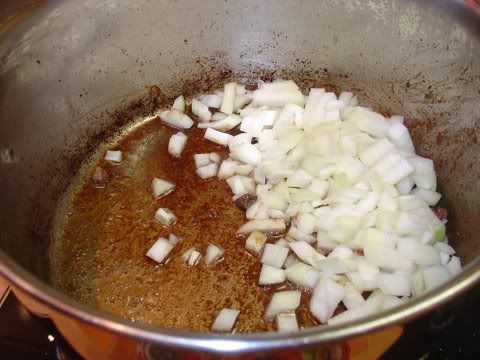
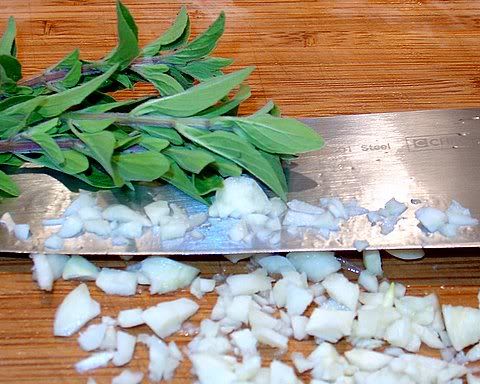

Remove the meat from the pan, lower the heat to medium and start caramelizing the onions, then mince the garlic cloves and the sprig of oregano. Add them to the pan and saute a minute or two. Do not brown the garlic or you will introduce a bitter taste into your chili.
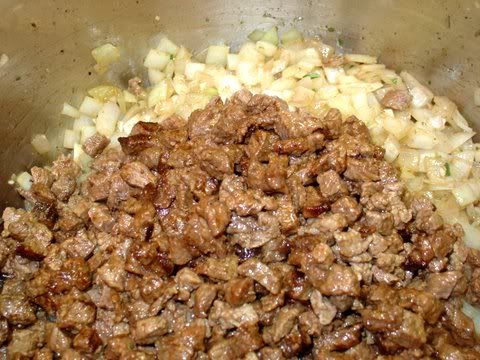

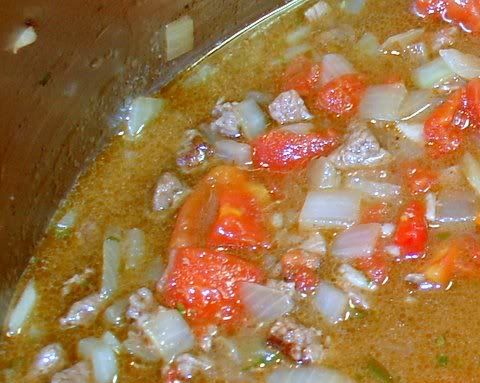
Replace the meat into the pan and stir the onions and meat together, then introduce the chicken broth and water into the mix. Bring this to a boil and add the can of chopped tomatoes. Why did I use chicken broth instead of beef...I just like it better, it adds another depth to the flavor and it introduces salt into the chili without overdoing it. Now that the chili is boiling, cover the pot and lower the heat to a simmer. Simmer the chili for an hour stirring occasionally to make sure it is not sticking to the pot. When you start the simmering phase, make certain the meat is entirely covered with liquid, even if you have to add more to the pot.
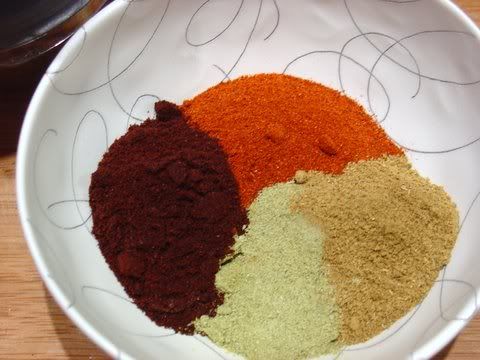
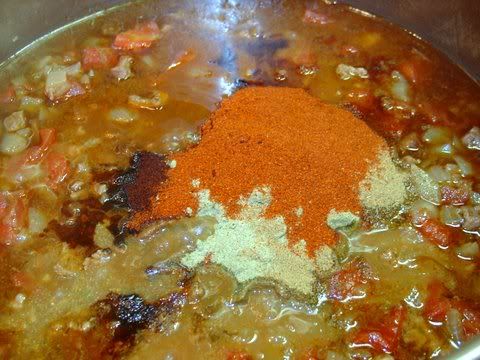
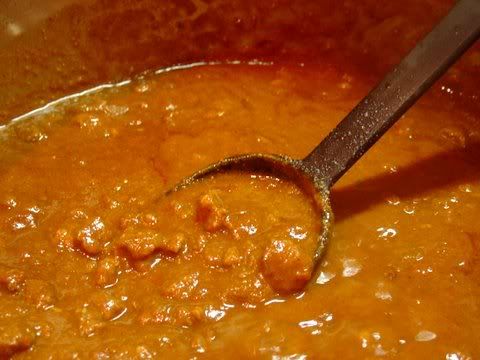
After one hour, check the tenderness of the meat. If it's very tough, add more liquid and cook longer, otherwise, add in the spices and cook for another 20 minutes. I didn't introduce the spices earlier because several of the recipes I looked at indicated that the chile powders should not be cooked for longer than 20 or so minutes. Since this was my first chili, I wasn't going to take any chances.Add the cornmeal for the last 10 minutes to thicken the chili. I used a course grained polenta that was on hand, and ran it through the coffee grinder to achieve a fine powder; no need to go out and buy masa. Stir the chili constantly after introducing the cornmeal.
* Notes:
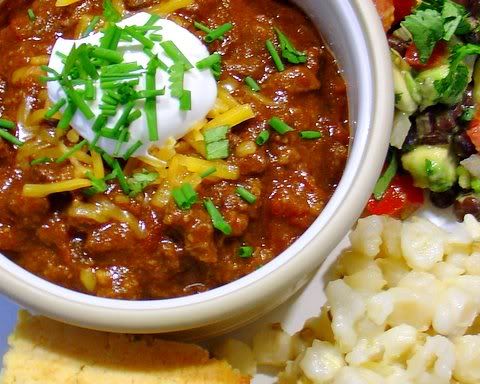
This chili was very hot and guests were kind enough not to complain although their eyes were watering from the heat. I served it with sour cream and cheese which are supposed to cut the heat, along with buttered hominy, since any fat including butter will also ease the "burn" in one's mouth. Until I make this recipe again, and am able to revise it, I would recommend that the chile powders with the asterisk be cut back considerably (at least half) and that the chile be tested for heat to see if more is required. I suspect that since I never bothered to taste the New Mexico chile, that it may not have been mild as the package indicated. Always taste chile powder to determine the heat level.


No comments:
Post a Comment