Showing posts with label Hors D'oeuvres. Show all posts

Friday, November 8, 2013

The Cheese Course

DSC05270
While renting a vacation apartment near Campo Dei Fiore in Rome, I took the opportunity to cook for friends and was drawing a blank when it came to dessert. Because I had seen so many cheeses in the nearby shops, it seemed like a good idea to finally try making a cheese plate, so I did.
DSC04257DSC04258  
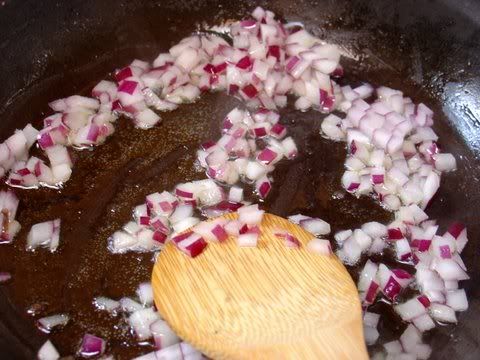
After selecting several types of cheese, I decided to include individual condiments with each selection. Since I had a Pecorino Romano with it's salty, strong taste, I decided to pair it with a shallot and fruit jam to contrast sweetness with the saltiness. First I sauteed the shallots in olive oil, added chopped cranberries and for good measure, some apricot juice.
DSC04261DSC04263
As it cooked down, it needed a little kick, so I added some balsamic vinegar and cooked it down even more until I had a reasonable density and textural contrast for the cheese.
DSC05269
I resorted to my old standby of goat cheese, walnuts and honey for the second course. I discovered that combination in the Dordogne area of Southern France and have been using it in salads ever since. Because I already had a strong cheese on the plate, I combined the goat cheese with the sweeter, more buttery tasting Mascarpone.
DSC04825DSC04827DSC04831
After mixing the equal parts of cheese together, each piece was rolled in chopped walnuts and a "dimple" was placed on each piece, so that they would  be able to hold some of the honey in place.
DSC05264
Although it is not shown in the first photo of this post, I also paired a semi firm truffle cheese with walnuts and that proved to provide a nice contrast in flavors and textures.
DSC04843
I've saved the best for last. I couldn't resist trying a sheep's milk ricotta, even though I had no idea what to expect. It turned out to be the sweetest most luscious ricotta I have ever eaten.
DSC04840
The condiment was so easy I didn't bother to photograph it. I merely heated some dried cherries in balsamic, let it reduce and develop a syrupy consistency and adjusted the taste with a little sugar.
DSC05263
It was so delicious, I used the leftovers for a small lunch the following day.

Thursday, December 29, 2011

Argentine Red Shrimp Salad

One of my favorite Trader Joe’s seafood items is red shrimp from Argentina. It has a more elegant flavor than regular prawns, almost a blend between lobster and shrimp. I’ve used them several different ways, but for the holidays I tried these two preparations.
DSC09992
DSC00078
Ingredients:
First Option: 6 oz red shrimp
extra virgin olive oil
4 green onions
2 medium celery ribs
chopped cilantro
mayonnaise to bind
wasabi mayonnaise to taste
black sesame crackers
black sesame seeds
or wasabi caviar

Second Option: red pickled ginger
round won ton
olive oil
Directions:
DSC00080DSC00085DSC00089 
Finely chop the green onions, then divide the celery into 4 pieces lengthwise and finely chop that. Add chopped cilantro. I didn’t measure these but I think about 1/3C onions, 1/2C celery and 2T cilantro would be about right.
DSC00092 DSC00097
Sautee the shrimp in a little bit of extra virgin olive oil until cooked. Dice the shrimp and add to the bowl, then add enough mayonnaise to bind the shrimp salad, just enough to blend the ingredients. Add enough wasabi mayonnaise or powder to add a very faint heat. Blend.
DSC00103
It should look something like this in texture. You can find the won ton cup recipe under Hors D’oeuvres, but it’s really simple to make. Just lightly rub olive oil on both sides of a won ton and press into a mini muffin tin, bake at 375 for about 5 minutes. When they start turning a light tan, they’re ready.
DSC00075 DSC00077
To finish, fill the won ton cup with the shrimp salad and top with chopped red pickled ginger. A pink pickled ginger slice would be a good alternative. In this 2nd photo I added some leftover wasabi caviar from another recipe being made on the same night.
Saturday, December 24, 2011

Asian Fried Mussel Variations

DSC00062
Ingredients for Fried Mussels:
green lipped mussels
1/4C flour
sake
1 fat clove micro plane grated garlic
1t micro plane grated fresh ginger
2t toasted sesame oil
1T chopped cilantro
panko crumbs
extra virgin olive oil

Ingredients for Garnishes:
lemon
creme fraiche
wasabi caviar
pickled ginger
mayonnaise
squid ink
Directions:
DSC09943DSC00002 
Here we have a clear case in which Nana would say, “Do what I say and not what I do.” I made this twice in a 2 day period and when I made it the 2nd time, I realized we had no more fresh ginger, so I improvised and used the red pickle ginger. Place the flour in a small bowl and mix in enough sake to make a thick heavy cream consistency. Add the garlic and ginger, then the finely chopped cilantro and mix. this cilantro could have been chopped more. I may try pureeing it in the future.
DSC00008DSC00004
Start setting up your flour and panko bowls near a frying pan with 1/2” of olive oil over medium heat. Dredge the first batch of mussels in flour. Add the sesame oil to the batter that may have started thickening by this time. Use enough to thin it back to the heavy cream consistency.
DSC00009DSC00012   
Dip the floured mussels into the batter, then dredge them in the panko. You may put them directly into the frying pan or set aside until you have enough mussels to fill the frying pan. The only advantage in setting them aside is that they will all be cooked at approximately the same time.
DSC00017
Fry over a medium heat and turn when they show signs of browning. These mussels were precooked and shelled, so they need little actual cooking. The aim is to brown the exterior and warm the interior of each mussel. Drain them on paper towels and if you have more to cook, place the finished mussels in a warm oven at 200 degrees.
DSC00026DSC00034DSC00044
Each of these mussels is topped with mayonnaise combined with squid ink. It has a hint of “the sea” in it’s taste, just a little brine flavor which you can also get with a gray, moist sea salt. The mussel in the top left photo is garnished with red, pickled ginger. In the top right photo, grated lemon peel was used as the garnish, and in this lower photo you can see the wasabi flavored caviar. Since I could only find the caviar in one shop in a quantity of 4 ounces, it was imperative to use as much as possible, since it doesn’t keep long.
DSC00051
Since there also was a glut of creme fraiche  on hand, I tried that with the wasabi caviar and have to admit, it had the best look and brightest flavor. Even though I prefer the fresh ginger, the cilantro and red  ginger give this a great look for the Christmas holidays.

Fried Seafood Appetizers

This is perhaps the only time I’ll talk about recipes without offering step by step photos, or exact proportions of ingredients. I was so rushed to get these made and onto the table that I completely forgot to take the necessary photographs. It is more of a record for future use than anything else; a basis for future recipes.
DSC09966
The Dore Style Fried Oyster (lower left) has already been listed here and I’ve done variations of the Asian Style Fried Mussel (upper left), but will discuss more ideas that were put together for this meal. That leaves the small Octopus, the Oyster Stuffing Fried Won Ton, and the Smoked Salmon Won Ton Cup which is exactly like my Smoked Salmon/Salmon Butter Phyllo Cups except for the cup.
DSC09969
Ingredients:
Sesame marinated mini octopi
flour for dredging
extra virgin olive oil for frying
sea salt or flakes salt
Directions:
This was a no brainer. I saw these precooked and sesame sprinkled octopi at 99 Ranch Market where I went to purchase the pre shelled and pre cooked green lipped mussels. I couldn’t resist putting one on each plate that I was serving to guests, because they were so darned cute. Being willing to try one myself was an essential part of the decision making process. All I did was dredge in flour and quickly fry in hot olive oil. They were delicious and even the non squid eaters were willing to give them a try. I hope to find them again.
DSC09970
Ingredients:
round won ton skins
2 oysters (buy in a jar and reserve liquid)
1/2  celery stalk
1 whole green onion 
6 finely diced water chestnuts
1/2C Pepperidge Farm herb stuffing
olive oil for frying
Directions:
Microwave the oysters to cook them (1 minute on medium high should do it) and then chop. Finely dice the celery, water chestnuts and green onion, then saute with a bit of the olive oil. Add the finely chopped oysters, stir and add the stuffing mix. After stirring, add enough of the reserved oyster juice to moisten. Place a small spoonful in the center of the won ton, spread some water along the edges of the won ton and fold in half, forcefully pressing the edges together. Deep fry until golden brown, then drain on a paper towel. These are good served with a Thai sweet chili sauce.
DSC00107
If you look back in the Hors D’oeuvres file you will see both a recipe for the won ton cups under “Fig’s Wonton Cup” and the salmon butter under “Smoked Salmon/Salmon Butter Phyllo Cups”. Replace the phyllo cup with the won ton cup and you have the means to make this appetizer.
DSC09956
The Asian Style Fried Mussels can be versatile with a variety of toppings. Since I happen to have photos of the process and several of the finished variations, I’m writing a separate recipe for them.

Dore Fried Oysters

When I needed a few oysters to make an oyster dressing, it occurred to me that there were enough oysters leftover for the number of guests at Christmas Eve dinner, so remembering I had seen this style of oyster made at Marin Joe’s, I decided to try them with my own spin.

DSC09985Ingredients:

1 jar shucked oysters
flour for dredging
1 egg
garlic powder
olive oil for frying
squid aioli or creme fraiche
wasabi flavored caviar

Directions:

If you can find a small packet of squid ink, then you’ll be able to mix it with mayonnaise to create the black background for the wasabi caviar. If not, creme fraiche is also a good choice.

The frying is so easy, I forgot to take photos of each stage, so the verbal description will have to do. Remove the oysters from the jar and drain, then dredge in flour, dip in the whipped egg and fry in the olive oil over a medium heat. Drain on a paper towel and plate. Place a dab of the aioli or creme fraiche on top and spoon on the caviar.

DSC09966DSC09957

Monday, April 11, 2011

Mushroom Turnovers

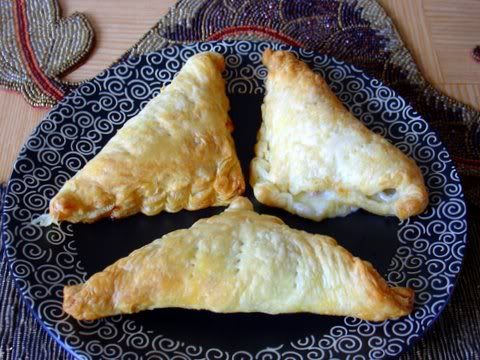
After one more recipe using Burrata and prosciutto, I'm hanging up my turnover hat for awhile. I love the ease of making them. They make tasty little starters, or a big appetizer, but my well is running dry for new ideas at the moment, and I would in fact, like to repeat a few before making something new. This recipe is for the first turnover I ever made; it was an appetizer for vegetarian friends.

Ingredients:
2C sliced mushrooms
1 large minced shallot
1T extra virgin olive oil
salt to taste
1/4t dried thyme
1package puff pastry squares

Directions:
First of all, thaw the puff pastry, then preheat the oven to 375 degrees.


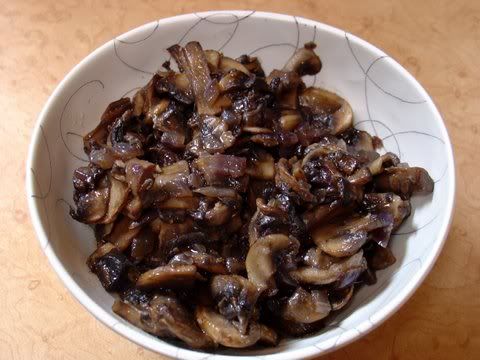
After the mushrooms have been sliced, give them a coarse chop. In a pan over medium heat, add the olive oil and saute the minced shallots until they are translucent. Crush the thyme and add it to the pan. Stir it with the shallots and saute until you smell the fragrance of the thyme. Now's the time to add the chopped mushrooms to the pan and saute them until they start releasing their liquid. Adding salt at this time will help in that process. Feel free to add a bit more olive oil if they start sticking to the pan before the liquid is released. Remove the mushrooms and set aside.


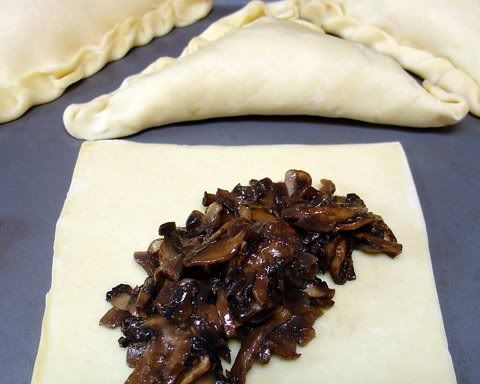
Place the puff pastry squares on a large, nonstick baking sheet. Add as much filling as you can toward the center of each pastry square, but allow at least a one inch border all around so you can seal the turnover properly.


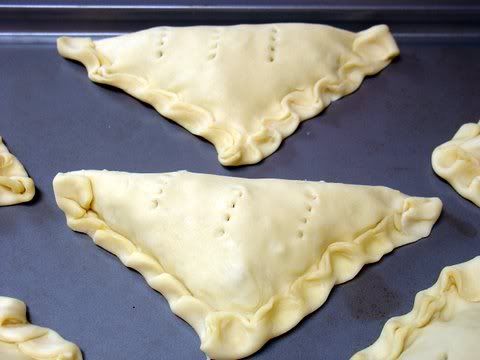
Fold two opposite corners of the pastry together, stretching it slightly over the filling and pinch all the edges to seal the turnover. Fold over all the edges by half an inch and crimp the edges. Use fork tines to press the edges together if you can't get the hang of crimping. Dock the top for venting steam (pierce with a fork in quick jabs).

Bake the turnovers until they are puffed and turning a golden brown. sometimes I lower the oven to 350 degrees after the first 5 minutes, to avoid burning the dough. Again, you can see what happens when the edges are not fully sealed. This can be avoided if you make certain the all the edges are dry and the margins are a full inch or more wide.

Thursday, March 31, 2011

Cheese and Sausage Turnovers

Yes, I've made turnovers before. My motto is to take a good idea and run with it, so since the turnovers have been successful I'll be making more of them with different fillings. How can I resist with frozen puff pastry so cheap and so available. A turnover is a useful tool for using up leftovers. I can't wait for Thanksgiving so I can try one with turkey, stuffing and cranberry sauce!


Ingredients:

1/2 red onion

3 Italian sausages

1T olive oil

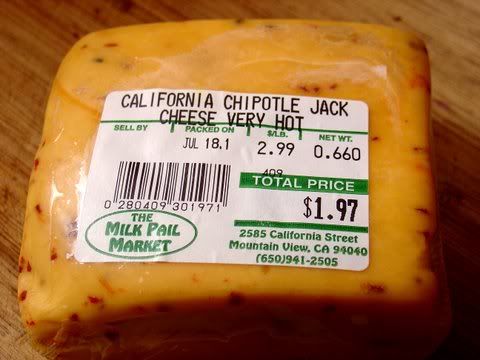
2/3C grated Chipotle Jack cheese

6
square cut frozen puff pastry

Directions:
Before starting on the filling, defrost the puff pastry.


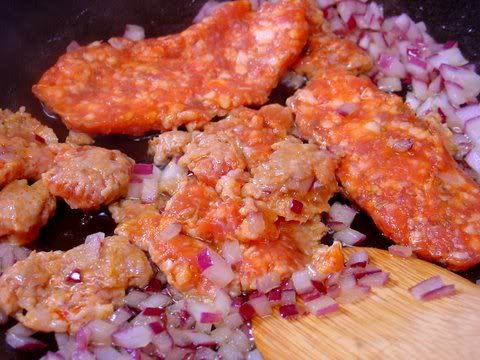
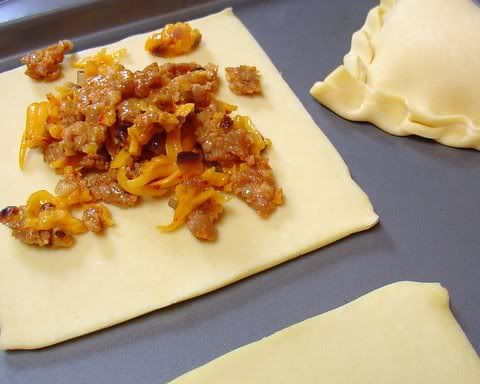
Finely mince the onions and saute them in the olive oil over a medium heat. After they have become translucent, add the sausage after you have removed the casings. Your aim is to cook and break down the sausage as much as possible into a fine texture, so you won't have lumpy turnovers with lots of air pockets. Preheat the oven to 350 degrees and place one of the racks in the middle of the oven for more even heating.


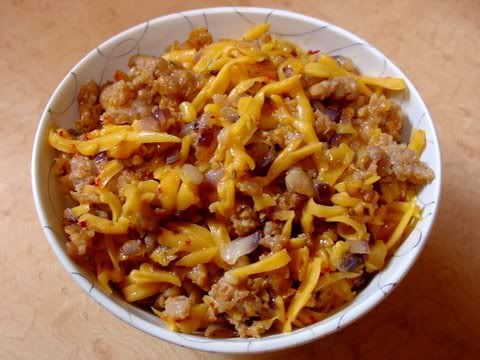
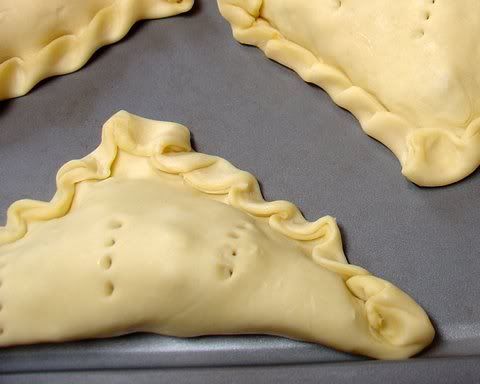
When the sausage is fully cooked remove it from the pan and place it in a bowl to cool down. Set aside, then grate the cheese with a coarse grater until you have 2/3 cup. Add the cheese to the cooled sausage and stir. Place the squares of pastry dough on a non stick cookie sheet, or a regular sheet pan covered with parchment paper and start filling the squares by piling the sausage mixture in the center with 1 1/2" margins all around. Fold opposite corners together and press firmly around all edges. You may have to stretch the dough to accommodate the amount of filling as you pass it over the top of the filling.

After all edges are secure, fold them inward by 1/2" and start crimping the edges. I can't explain it, you'll just have to see it, or take the easy way out and just press fork tines along the edges to make sure the turnover edges are sealed. Dock the top of each turnover with fork tines, so steam can be released.

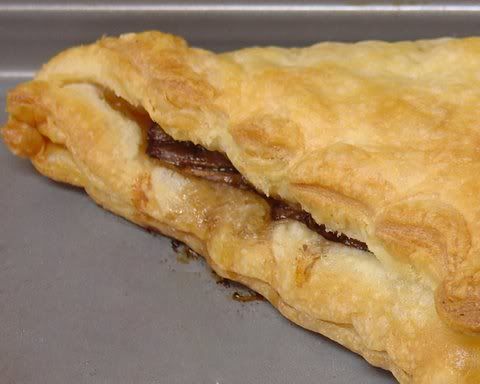
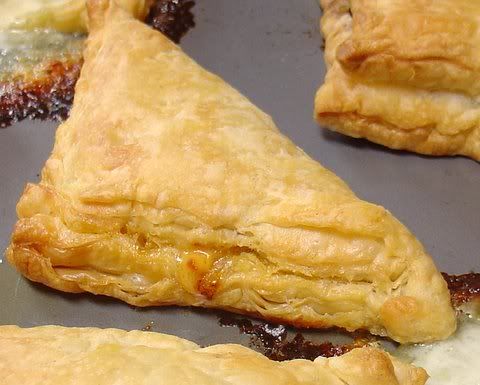
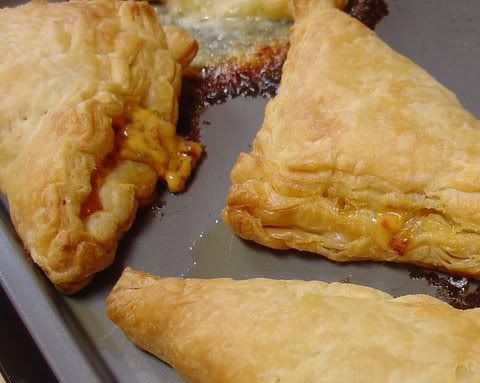
This photo is evidence that my edges were not as fully sealed as they should have been. "Do as I say, not as I do."