Showing posts with label Turkey. Show all posts

Wednesday, December 31, 2008

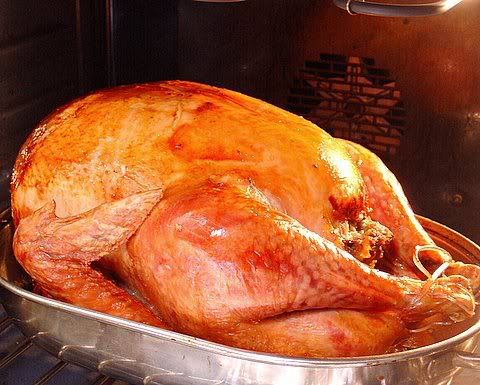
Roasted Turkey

This is not a family recipe, but a common sense approach for my nieces and nephews, if they should ever want to know how to roast a turkey for themselves and can't get in touch with their mothers for help. Better yet, if they want to surprise their mother's with a roast turkey dinner!

Ingredients:
1 turkey
stuffing (see recipe below and adjust for your own tastes)
butter (if you insist)
Special Equipment:
a roasting pan (a throw away aluminium one will do but you should not attempt to make gravy in it)
a small rack (to elevate the turkey from the pan, so the fat and juices will flow away from the bird)
cotton string
trussing pins (they have a loop at one end for the string, and a point at the other to jab into the bird)
a meat thermometer
Directions:
The first thing to do is make your stuffing, even if it is out of a box, and have it ready to stuff into the main cavity of the turkey and well as the neck area. How do you tell the difference? The tail is at the bottom of the main cavity, sometimes tucked into the cavity, and the neck area is at the opposite end with usually a large flap of skin. You'll need to rinse your fully thawed turkey if you haven't bought it fresh (this may take several days in the refrigerator). Pull out the small package inside the turkey (no it does not come that way in nature, this is a processed bird...) and toss it if you decided against using it for the stuffing...or save it for cat food (Buddy loves the liver).
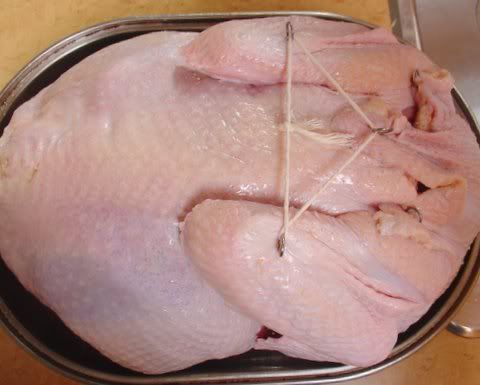
Preheat your oven to 450 degrees after adjusting the shelves so the turkey will fit into your oven. Pat the turkey dry with a paper towel and start the stuffing process, leaving a small amount of room for the stuffing to expand (you don't want your dinner to explode do you?). After you fill the neck cavity with stuffing you'll find the trussing string and pins very handy. Fold the neck skin tightly toward the turkey and pin the center of it to the turkey back. Take two more pins and secure the wings against the turkey carcass. Now tie the string between all three pins and place your turkey breast side down onto a small rack (I use a cake cooling rack) that you've placed in the pan. Make sure no turkey parts are falling over the edges.You may add more pins to keep the stuffing from falling out of the turkey.
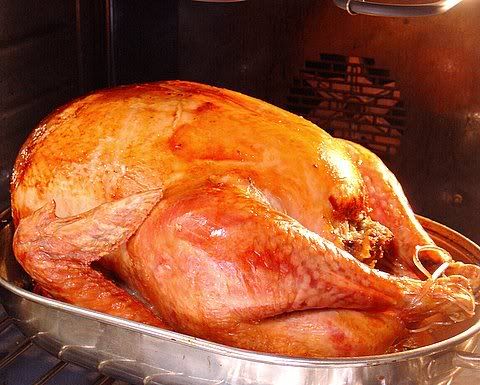
Now roast in the oven, uncovered for 30 minutes. Lower the heat to 350 degrees and place your roasting pan on your stove top. Here's the hard part, flip the turkey over in the pan, so the breast can get cooked to a nice golden brown. I use oven mits. This is the only time I want to hear about you flipping a bird (don't let me down!). Then return the turkey to the oven set at 350 degrees (yes, I'm repeating myself, because it's important to roast the turkey at the lower temperature, so it won't burn or dry out...325 degrees is good too ). Take a look in another 30 minutes and if the breast is a nice color, cover it with tin foil (just lightly placed on top) to keep it from burning. Use the meat thermometer to test the temperature of the turkey; 150 degrees is perfect. Place the thermometer in the thigh meat but don't touch a bone or it will be inaccurate. Let the turkey "rest" for 20-30 minutes before carving (I know it's dead and cannot possibly be tired, but if you skip this instruction, your turkey will be dry, since the juices will flow out like Niagra Falls in Spring, and will not be able to reabsorb into the turkey meat).
What about the butter? Some people think you need to smear butter all over your turkey to make it roast to a beautiful golden brown. We only used the drippings to baste this turkey. What do you think?

Tuesday, December 30, 2008

Basic Pan Gravy

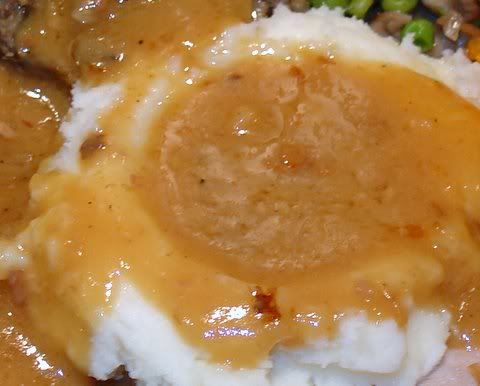
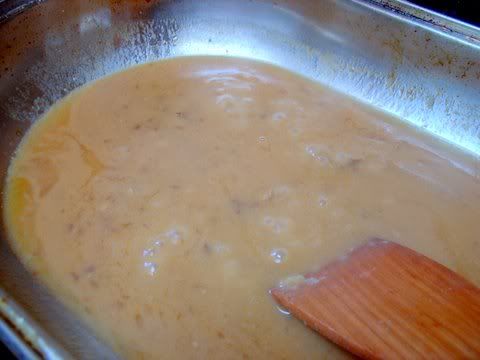
This recipe will work with any pan drippings and can be made much more exciting by adding herbs, garlic, wine, port, or other seasonings, but for a turkey dinner I simply prefer this basic recipe. As you can see by the photo, I don't bother to strain out any bits that don't blend into the gravy. Those tasty little morsels add to the flavor even if they take away from the visual appeal.


Ingredients:
Pan drippings from a roasted turkey
2T flour
butter
chicken broth
salt & pepper to taste

Directions:

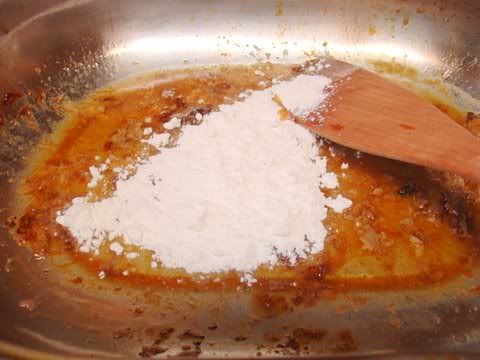
Roast the turkey and remove the bird from the pan. Drain off all the juice and fat and place in one of those wonderful cups that separates them, or scoop off the fat the hard way with a spoon. Place the roasting pan on a burner over low heat and add the flour and fat from the drippings to produce a roux by stirring them together until they slightly brown. Try to scrape the pan to get all the toasted bits off the bottom and into your roux.

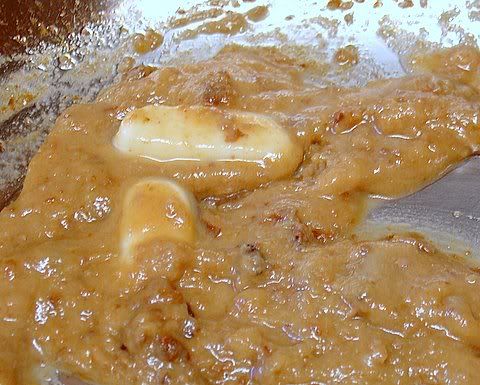
Difficult as it may seem, if you don't have enough turkey fat to make the roux, add a pat or two of butter. After your roux is completed, add back the turkey juices and stir until smooth or whisk if you prefer. If your gravy is too thick, add in half of the chicken broth and raise the heat to medium until the gravy starts to simmer. Keep stirring or whisking and only add more chicken broth if it is still too thick. The more broth added the less your gravy will taste of turkey.

Monday, December 29, 2008

Bread Stuffing for Turkey

You might call it "dressing", but this dish is definitely stuffed into, as well as cooked in the turkey, so I can only call it stuffing. It's basically Mom's recipe with the exception of the sake and sage. How did Japanese rice wine get into the recipe? By accident...I was out of broth and the stuffing was still too dry so I had to improvise. It added a nice nutty flavor so it became my secret ingredient...the one I tell everyone about! I must note that the idea of adding extra liver came from my sister and it was a very good idea. Still this is a traditional stuffing and I look forward to some more improvisation in the future.

I've read quite a few points of view on the "dangers" of cooking a turkey with stuffing and I have to say I believe people are going overboard on the safely issues. If your stuffing is room temperature, your bird is well defrosted and you're willing to cook it for 10 minutes per pound instead of 8 minutes, you'll live to tell the tale of your wonderful meal.

Ingredients:
1 large yellow onion
3 ribs celery
2 cans whole peeled water chestnuts
8 large sage leaves
1/2 pound brown Crimini mushrooms
turkey heart, liver and giblets
chicken or duck livers to equal the turkey liver in size
1 16 oz. commercial dressing mix
1C chicken broth
1C sake
2 large eggs
1-2T extra virgin olive oil

Directions:
After dicing the onion and thinly slicing the celery, saute them over a medium heat until they start cooking and are no longer crisp. Mince the sage and add to the saute pan, then dice the water chestnuts and add to the pan stirring them all together. Shut off the stove at this point.
Start mincing the turkey parts that comprise the heart, liver and gizzard (scrape off the silver skin from the gizzards). These add a nice texture and rich flavor to the stuffing. I usually add more liver to equal the amount of meat produced by the turkey parts just minced. Either chicken or duck will do if you cannot buy more turkey liver. Now move over the vegetables, bring the heat back on and saute the parts until they are mostly cooked. When the red, raw meat look is gone, add the mushrooms that have been either thinly sliced or diced and continue to saute until they have lost moisture and are cooked.
Add the bread cubes to the pot and stir into the other ingredients. This should be fairly dry so add the cup of chicken broth (if using a can of broth, reserve the excess for use in your gravy if you need to extend it or thin it out). the stuffing should still be dry so add the sake, a little at a time until you have the moisture level you prefer. Add 2 large or extra large eggs and stir thoroughly.
Notes: I normally use commercially produced, seasoned stuffing mix, but plan on trying my next stuffing with cubed Pugliese bread instead. In that case I might add poultry seasoning to the recipe. This time I used a mix that had white and wheat bread in it. I believe the wheat adds a sweetness that would preclude me from using it in the future.